Your toilet tank can leak without any warning signs. This can lead to wastage of water and weak pressure when you flush.
Often, these leaks are due to the fill valve intermittently opening. So, it’s wise to periodically check both the toilet tank and the flush valve. Luckily, the test is straightforward and something most people can handle on their own.
Hence, we have curated this guide on how to test your toilet flush valve and fix it accordingly. Keep reading.
How To Test A Toilet Flush Valve
Testing to see leaks in your flush valve is quite simple and easy. You will only need food colouring. To do that, dye the water in the tank with some food colouring. You can then wait for a moment and check the toilet bowl for dyed water. If you see any, it means the water level in the tank is dropping due to a leak.
Once you’ve tested your toilet for leaks, it’s time for a fix. Start by opening the tank lid and taking a look at the flapper chain. If it’s too tight or too loose, it might cause an incomplete flush. Also, have a quick peek at the refill tube to ensure it’s in the right spot. Tackling these parts often sorts out the problem and helps avoid future leaks.
Choosing The Right Fix For Your Toilet Flush Valve
Your toilet tank can be set up in two different setups.
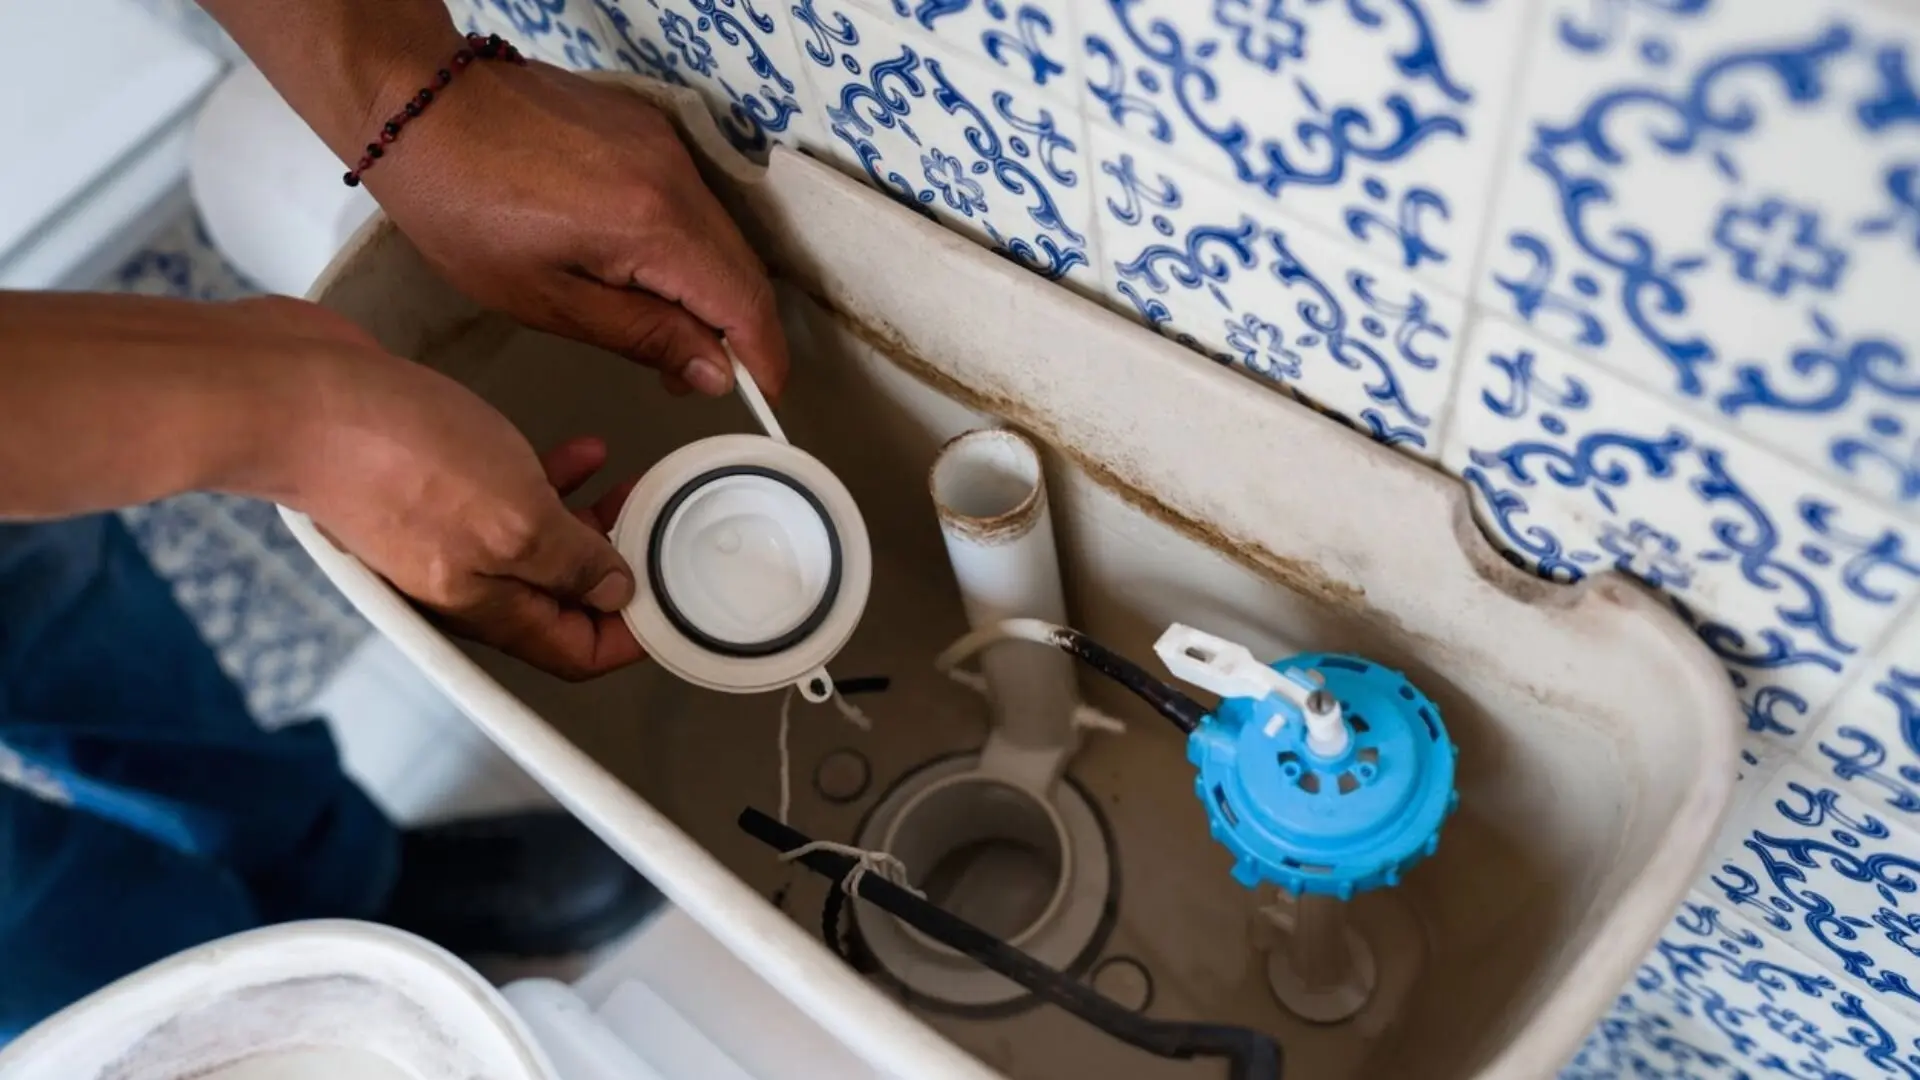
Older fill valves come with a tank ball float at the end of a long metal rod, while modern ones use a cylindrical float that moves up and down a shaft. A leak often points to a damaged fill valve, meaning it’s time for a replacement.
Here, it is essential to remember the type of fill valve you are currently using, as the fix will differ accordingly.
How To Fix The Flush Valve Of Your Toilet
You will need the following things before starting the process:
- A wrench
- Dry towel
- A flat-blade screwdriver
- Food Colouring
Step 1: Turning off the main water supply
You would not want to be drenched as you fix the toilet flush valve, so remember to turn off the water supply at the supply valve. To do that, locate the knob based on the set-up of your toilet. Turn the knob counterclockwise with your hand or wrench until water stops running inside the toilet tank.
Step 2: Drain any remaining water
Now that the water supply is cut off, it will not fill up again. Drain any excess water from the toilet tank and wipe the toilet tank with a dry towel, so you have a dry surface to work with for a better grip.
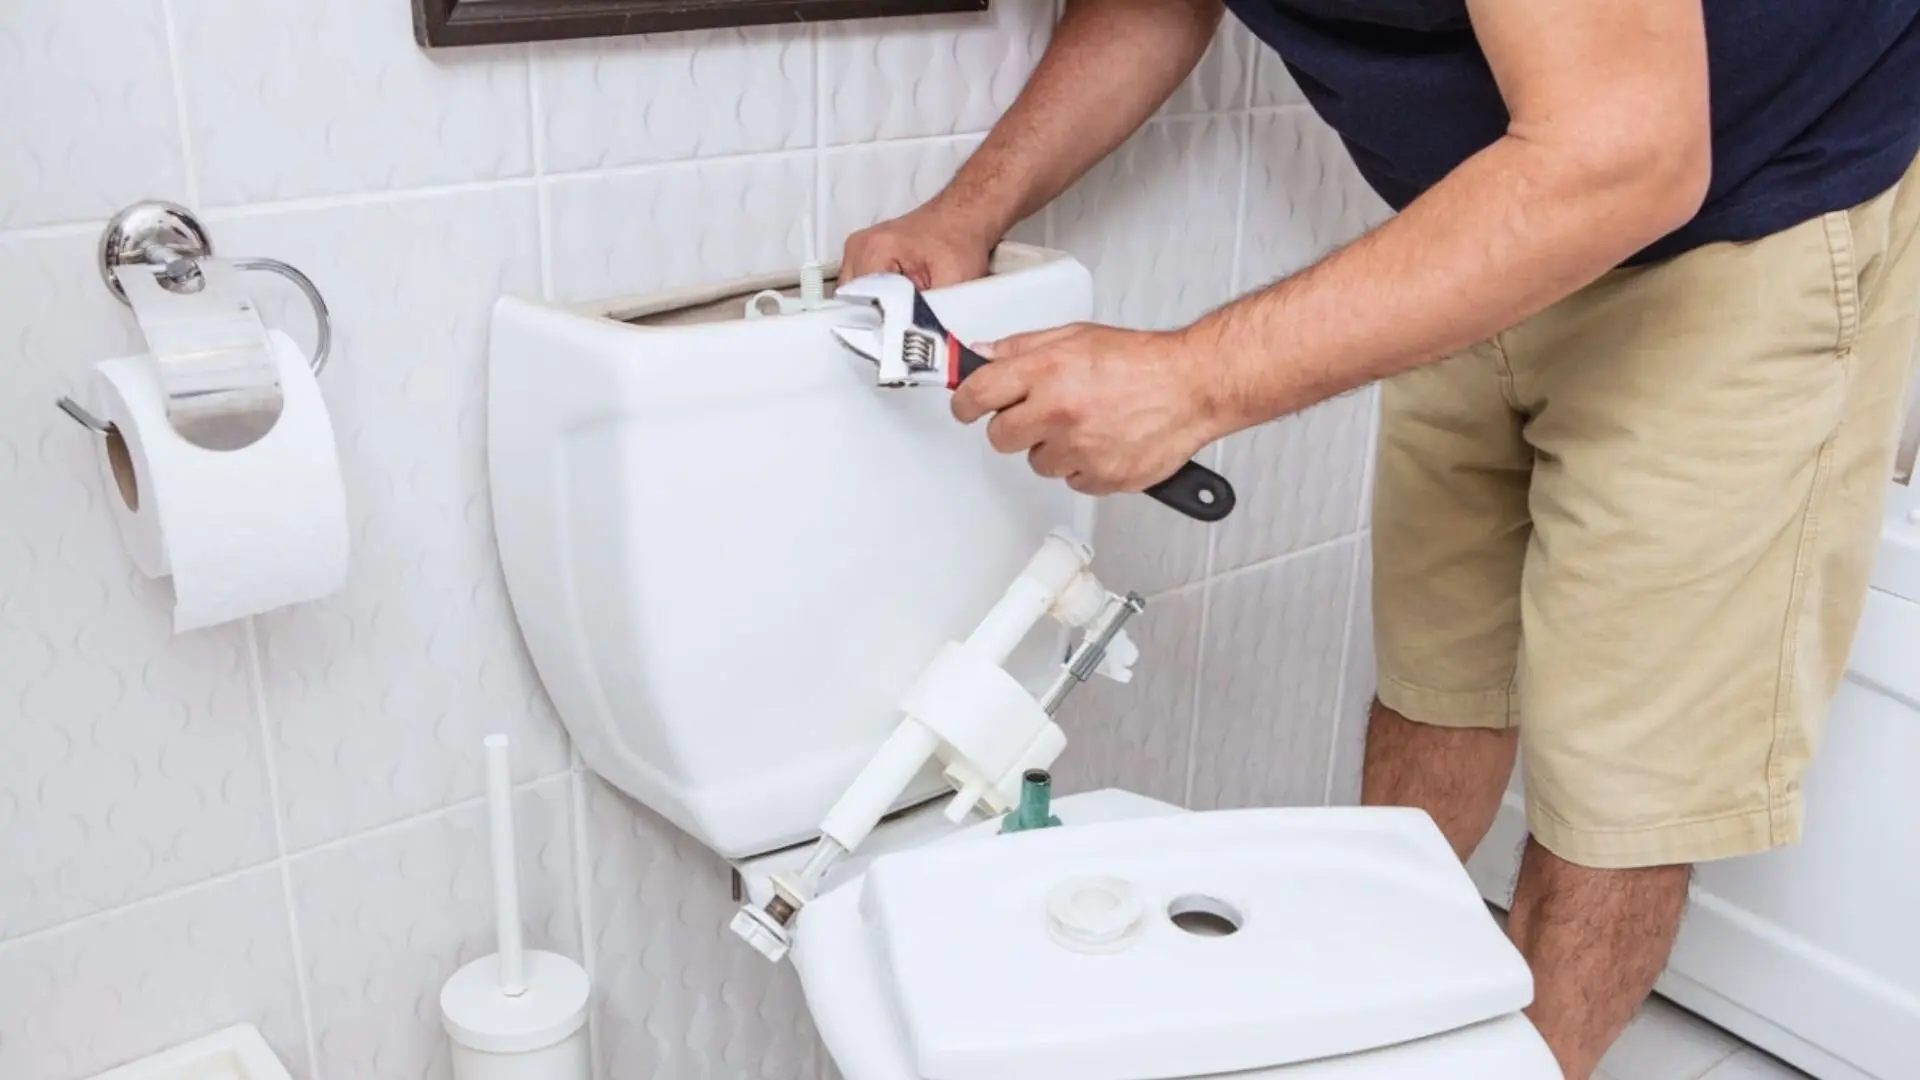
Step 3: Unscrewing the flush valve
Keep hold of the nuts below the bowl with your wrench. Then, a screwdriver was used to unscrew the two rubber bolts at the side of the flush valve. Do not put too much pressure as the tank can crack or break with it.
Step 4: Installing a new valve
Remove the broken flush valve and place the new one with the overflow pipe facing the flush valve. This is important because the overflow pipe needs to be vertically placed so that water does not overflow. Lastly, use your wrench to tighten the bolts of the new fill valve.
Step 5: Final check
Switch the water supply back on and add a bit of food colouring. As it fills, watch for leaks in the toilet bowl and adjust screws if needed. Give the flush lever a pull to check the water pressure.
Other Common Problems With A Toilet Flush Valve
A. Broken toilet flapper
In case of a worn-out toilet flapper, you will have leaks. The fix is quite simple.
- Turn off the water supply to the toilet tank at the supply valve.
- You can remove the old flapper attached to the overflow tube and detach the chain from the handle arm.
- Attach a new flapper to the overflow tube by reserving the last step.
- Once completed, check for any leaks with dyed water.
B. Blocked flush valve seat
Another reason for leaking flush valves could be a blocked flush valve seat due to mineral deposits. With mineral deposits, the flapper will not seal properly against the flush valve seat, so it will need to be cleaned. To do that, you need to:
- Turn off the water supply at the supply valve.
- Remove any mineral deposits carefully with a soft sponge.
- Be careful not to put too much pressure and scratch the surface.
- Once you remove all the mineral deposits, turn on the water supply to fill the toilet tank and check your toilet bowl for leaks.
- Lastly, press the flush lever to check the water pressure.
Testing a Toilet Valve
Initially, a leaking flush valve might not seem like a big deal. But if you don’t tackle it fast, you’ll waste water, which could lead to sky-high water bills. So, make it a habit to check your toilet tank for leaks and sort out any issues pronto.
The guide above offers straightforward steps, but if DIY repairs aren’t your cup of tea, you can always call in the pros. At Fixed Today, our expert Sydney plumbers are ready to fix your flush valve. We believe in upfront pricing, so you know exactly what to expect on your bill. Plus, we’re available for emergency plumbing services, too.
Whatever the hour, Fixed Today is just a call away for all your plumbing needs.


